Showing posts with label birthdays. Show all posts

Wednesday, March 30, 2011

Going Ape Over Turning 4~

My baby turned 4 last weekend. 4!??! This age is a great age, though. Old enough to be somewhat self-sufficient, young enough to still want cuddles on a daily basis.

All the kiddos wanted to show you how old Mr. Three is. Mr. Three is the busiest of my four kiddos. And true to his busy nature, he had a hard time narrowing down the type of party he wanted. So, in the end, I "helped" him. I knew that last week was going to be a crazy one for me, so I wanted a party that was light on prep time. And while looking through the "party" aisle at Tar-jay a couple of weeks ago, the theme was decided for me when I saw these very cute invitations by Paul Frank. (What? Pre-made invitations? I know...so NOT me...but like I said...they're cute...AND busy week + desire for minimum prep = pre-made invites.)

I purchased these fun pre-made party hats. But, of course, they needed a little sumthin', sumthin'.


So I embellished them. This was super simple to do. I used my 3" circle craft punch to punch out these great monkey faces from some Paul Frank wrapping paper that we already had on hand. Then I just glued them on to each hat.


To add the fringe, I simply used red construction paper (which happened to be exactly the right length to wrap around each hat.) I cut 2" strips, then folded them in half and cut the fringe. To attach them to the hat, I simply stapled the bottom layer to the hat up near the fold, then folded the top layer back down to hide the staples.


For the party favors, I opted again for simplicity. I simply filled clear cellophane bags with some candy and punching balloons, then stood noisemakers on their ends so that the fun mylar came out the top of each bag, and tied them with curling ribbon and tags made from more red construction paper and monkey faces cut from the same wrapping paper.


The cupcakes followed suit. Rather than making cupcakes as I usually do, I bought them. GASP! To make them more personal, I added sprinkles, placed them inside colorful cupcake cups, and added toppers made from more of the wrapping paper. SO EASY!!!!!


To entertain this little group of 3-5 year olds, we made "sculptures" using toothpicks and marshmallows...this required a little bit of supervision, but nothing my bestie, and my two older kiddos couldn't handle.


Mr. Two eating his sculpture.


Then we played monkey-themed games including a relay race where each kiddo had to hold a banana under his chin while running the course, freeze dance (yeah, okay, so that really had no monkey theme), and red-monkey, green-monkey (the ape version of red-light, green-light).

My bestie and her cutie-pie (one of Mr. Three's besties...isn't that convenient?)


One of Mr. Three's favorite gifts...he's already worn the batteries out...no seriously.

Quite possibly the easiest party I've ever thrown...and the kiddos loved it!


Especially this kiddo...which is the whole point!


Happy Birthday, Mr. Three! We love you!!~

Monday, February 28, 2011

A Spa Birthday Party~

My Saturday was spent with a house full of little girls squealing and laughing as they got their fingernails painted and had facials made from plain yogurt and avocado (that was hilarious, by the way!)


The Princess turned 8 years old this weekend, and for her party, we decided that it would be fun to do a Spa theme.

I previously posted about the invitations which were fashioned to look like sleeping masks. If you'd like to read more about how I made them click here.


The color scheme was basically a dark tealish-turquoise blue and hot pink...with some lighter pink and black thrown in for good measure.


To make the table look festive, I put out some of the Spa fixin's. On one small serving tray I placed mini bottles of fingernail polish in hot pink and blue. The girls got to pick a bottle which we used to paint their nails...and then which became part of their take-home goodie bags.


I also had a tray full of temporary tattoos which I made using my Silhouette Digital Cutter (did you know they have printable tattoo paper?) I used their software to create an image of a "spa girl" complete with a green-tinted facemask and cucumbers on her eyes. Then I printed them out on the tattoo paper and followed the directions to add the adhesive. The girls loved them!


I laid out the goodie bags which were filled with toe separators in hot pink (of course!), pretty emory boards, fruit flavored lip gloss, and the fingernail polish the girls chose. I couldn't find the exact bags I was looking for, until I ran across this little tutorial at Jones Design Company (complete with the striped paper to print out.) I made the bags, and then just added the cute little "Thanks for Coming" tags which I made using my Silhouette (again....that little thing is quite useful, I'll tell ya!)


Finally, the cupcakes. You know I can't resist cupcakes! I found some darling cupcake papers at Michael's Craft in the colors we were using. The Princess requested chocolate (she is her mother's daughter after all). I just topped them with cream cheese frosting and hot pink or blue sprinkles. I love the way they turned out.


Hanging from the chandelier are a bunch of a mini tissue pom poms to add a festive touch.


And just for good measure...a photo of the princess covered in her avocado & yogurt facial. (She's gonna love me for this.)


Happy Birthday darling girl!


Wednesday, February 16, 2011

DIY Spa Birthday Party Invitations~

It's a big birthday for the Princess this year. She's turning 8! To celebrate we decided to throw a Spa party. We're going to have a whole gaggle of little girls over to be pampered...facial masks, painted nails, the works!


Of course, every great party starts with a great invitation. And since I was making the invitations anyway...the blogger in me decided to photograph the process so that I can give you all a tutorial on how to make cute Spa Birthday party invitations. You know, just in case you should ever be throwing a Spa party. ;-)


These invitations were adapted from some I found on Martha Stewart.com... because I believe in giving
credit where credit is due.


First up: The Supplies

You will need:


colored cardstock - now, I just happened upon some cute oval notecards at Target that I knew would make my life easier for this project. They were just the right size, in the right colors, and they included envelopes. So I bought two packages.

stick glue - my glue of choice when doing paper crafting.

scallop edge scissors

regular scissors

ribbon

Next: The Process:

1. The first thing I did was cut out a template. I should probably have done this using printer paper or something. But because I trust too much in my mad skills, I just started cutting one of the notecards. Then I ended up having to fold it in half to get it even, so I couldn't use it. Luckily, I had more cards than I needed, but HELLO?


    2. Then I traced the template onto the other cards. You will trace as many as the number of invitations you are going to make. (makes sense, right?)


3. Cut out all the pieces you just traced. Since you probably wont be using notecards like I did, you will also want to cut rectangular pieces of cardstock in a coordinating color that are big enough to glue the cut pieces on and still have a border around the edge.


4. Now cut lengths of ribbon. I cut them long enough so that they could actually tie around a person's head. Of course you can cut them shorter if you so choose...just make sure that they are long enough to fit across the width of your sleepmask and still have ribbon dangling on both sides.


5. Using the stick glue, cover the back of your cut pieces entirely, then put a stripe of glue across the approximate center of your rectangle (remember I'm using the oval notecards...that's why there's no rectangle pictured). Lay the ribbon across the stripe of glue and then place the cut piece over the top.


6. Now using your scallop edge scissors, cut the rectangular piece to the same shape as the cut piece leaving approximately 1/4 inch showing.


7. Tie a card with the party details onto one of the strings.


8. Stuff your finished invitation into a cute envelope for delivery.

There you have it. Easy peasy Spa-themed invites. Enjoy!


linking to these parties:
Tip Junkie handmade projects

Get Your Craft On Tuesday at Today's Creative Blog.

Monday, September 20, 2010

The Long-awaited, Much-anticipated, 5-year-old Pirate Party Extravaganza~

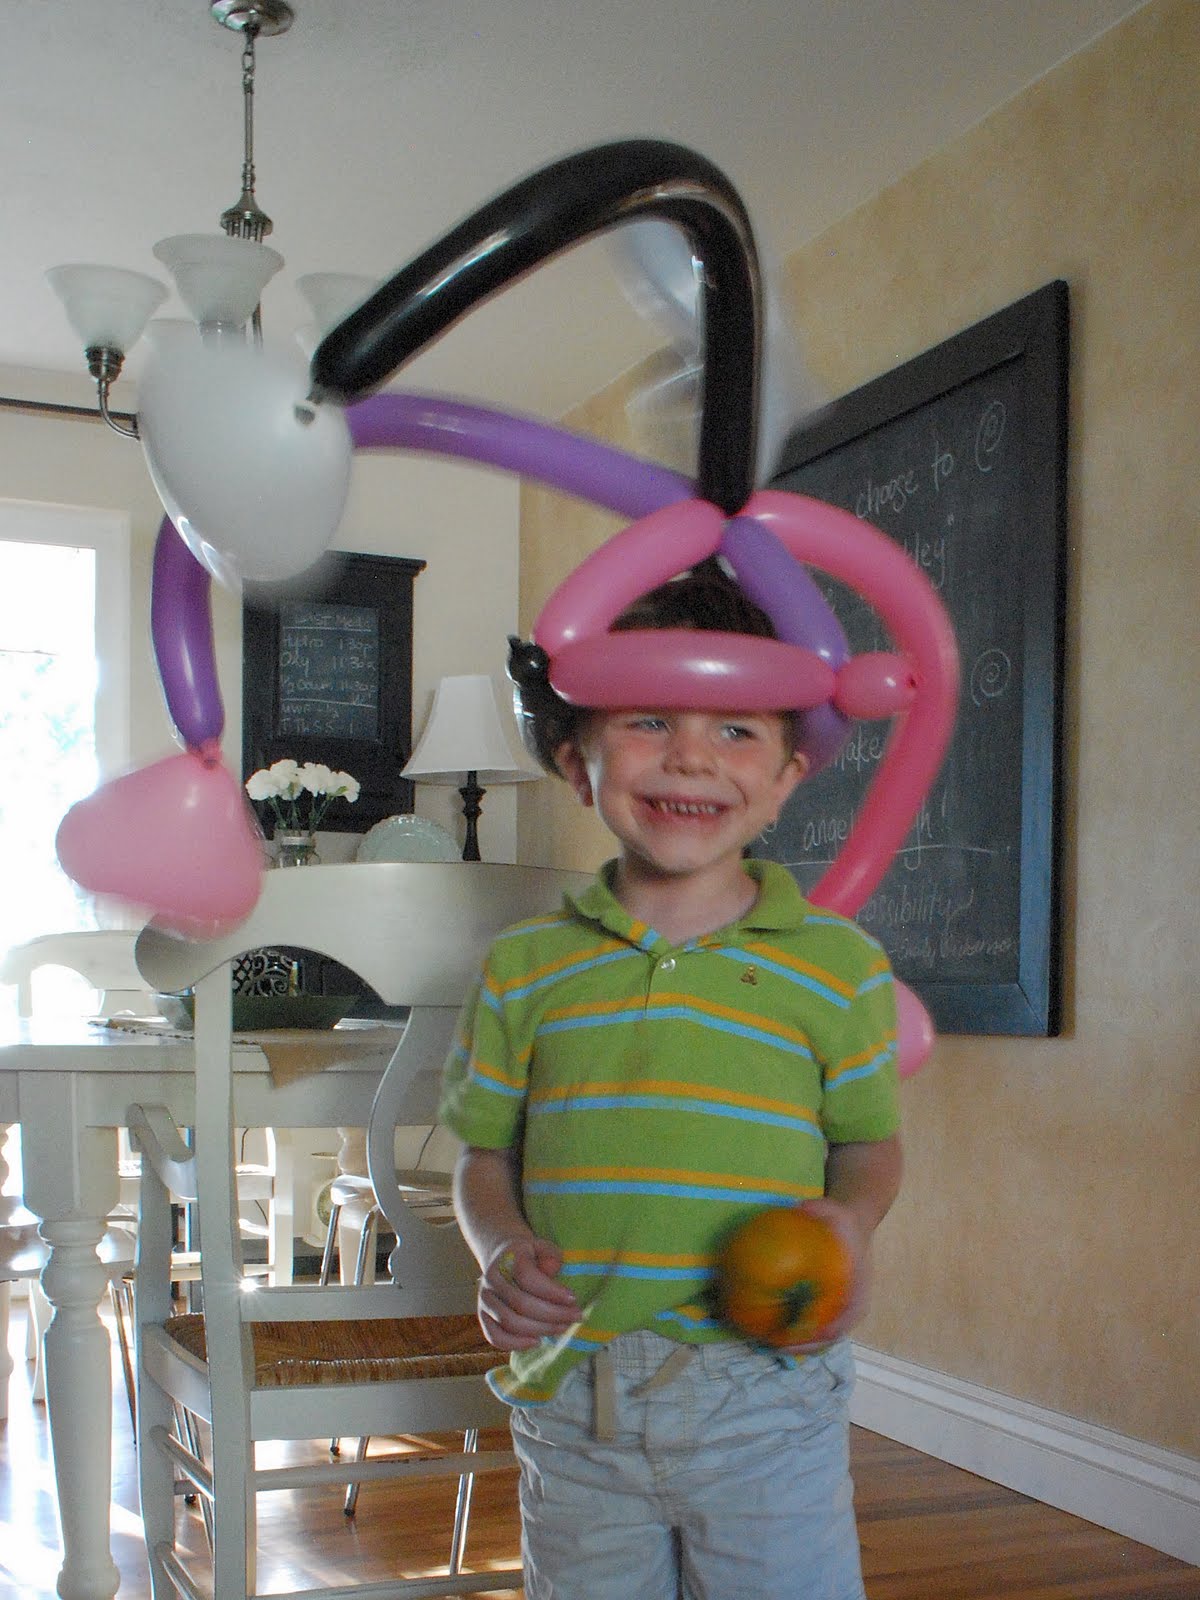
Mr. Two turned 5 last week! His birthday was on Thursday. Mr. One and the Princess often go to the local Farmer's Market with our next door neighbors on Thursday afternoon, and this week, seeing as it was their little bro's birthday, they came home with a special present for him...this uber-fabulous balloon birthday hat, and a mini-pumpkin. I thought it was so sweet of them to spend their meager funds on their little brother, that I just had to include this photo. (He was pretty excited as you can tell. )
Mr. Two has been asking for a Pirate Party ever since his Dinosaur Party ended last year. So I knew that I *HAD* to throw one for him despite the craziness that has been our life of late.


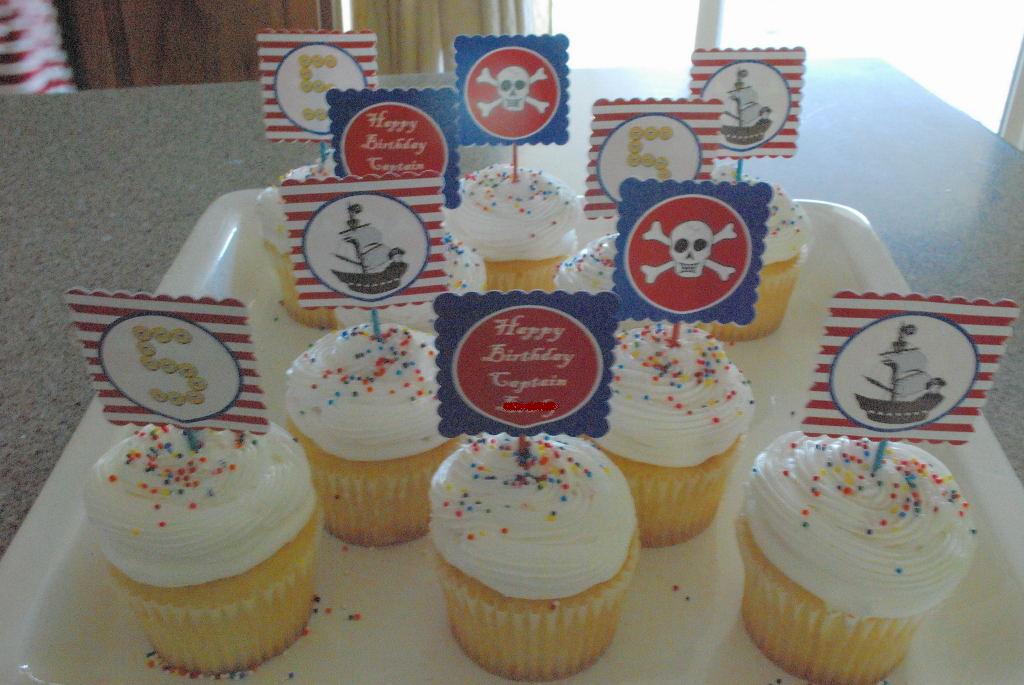
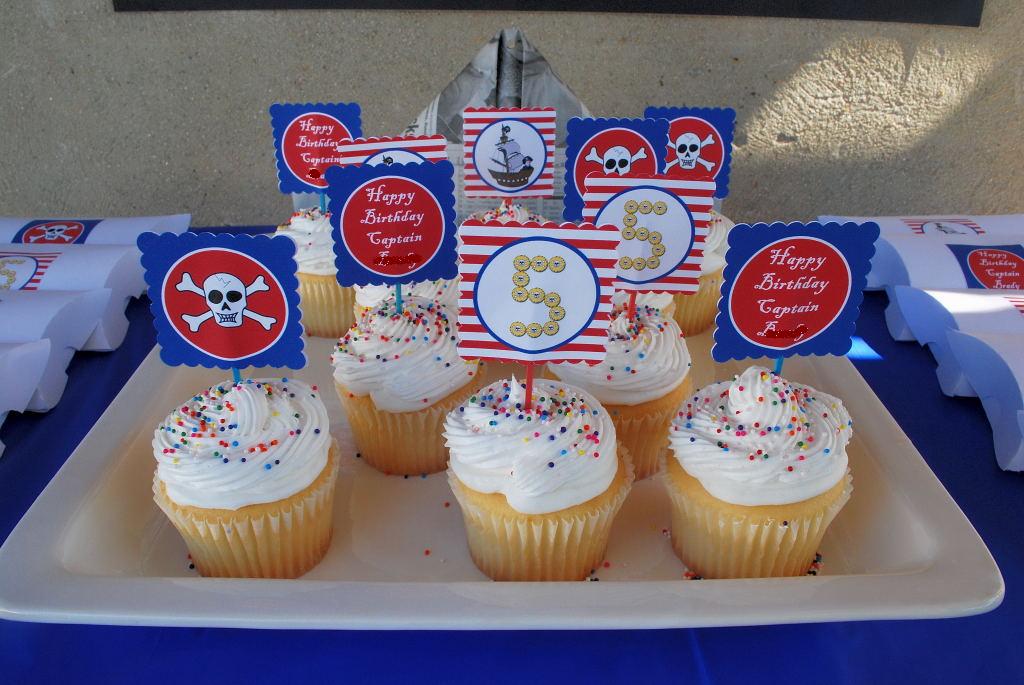
If you've been reading my blog for any length of time at all you probably know how much I love cupcakes. A birthday just isn't a birthday at our house without cupcakes! And check out these darling cupcake toppers! They were generously donated to me by Nina from Momma Go Round! She knew I had been dealing with a lot lately, and wanted to make my life a little easier. Boy did it ever!! She even personalized them with Mr. Two's photo and used the same font as I used on the invitations! You can get your own personalized cupcake toppers and invites at her etsy store!


To tie in with the paper hat theme from the invitations, I hung paper hats from our balcony. (Just a note...I am super embarassed by the state of the balcony...it is in desperate need of a paint job...but we DO live in a rental, so it's not entirely my fault. )


This cute nautical bunting was borrowed from my sister-in-law who used it for her son's wedding dinner last year. I thought it would be the perfect addition to the festivities!


Before our little buccaneers could begin the festivities, they had to be *decked* out appropriately! I found these cute pirate costumes at the dollar store!


Once they were all in proper pirate garb, they headed out on a treasure hunt (you can see that the hats didn't really stay on...the swords on the other hand....) Mr. One and the Princess were their guides on their search for pirate loot!


The table outside held the cupcakes along with goodie boxes.


I created the goodie boxes with my Silhouette digital cutter and embellished them with more of the cupcake toppers!


I made the Jolly Roger flag out of a piece of poster board...and cut out the skull and crossbones with my Silhouette....couldn't have been any easier!
The party went off without a hitch. And the boys all loved it! That night as I was working at the computer, Mr. Two tip toed up and gave me a hug...and said with a perfect smile "Mom, Thanks for my Pirate Party!"
It simply does not get any better than that.
xoxo
Wendy

Wednesday, September 15, 2010

A quick note~

Hello, my dear readers. I'm trying very hard to keep my eyes open and finish my Frugal Round-up post, but my heavy eyelids are winning. We spent the better part of yesterday at the Orthopedic Surgeon's office having stitches and staples removed and recasting John's leg. Ouch! I felt so bad for him. My hubby is one tough guy. I mean really. A big, strong, tough guy. But when they wheeled him down and took xrays of his leg, I could hear him scream out in pain. It broke my heart. The xrays revealed that his leg is healing well, but he still won't be able to put any weight on it for another 6 weeks. And all that movement of his leg, not to mention fitting it with a new boot and a new knee brace, made it really sore. Poor guy hasn't been able to get the pain under control yet.

But can I ask you? What is it about men that makes them want to bring home copies of their xrays? Lots of metal plates and countless screws holding his right leg together now, and he wants images of it. It makes me shudder.

We're off to the hospital again today to xray his chest. Here's hoping those fluid levels have gone down. Keeping my fingers crossed.

On a lighter note....


Today is Mr. Two's 5th birthday! Happy Birthday Boo!!! This boy is so sweet and so bright. He tells the best stories ever, and is absolutely hilarious. He lights up our days! I'm so thankful for him! Still working hard on his highly anticipated Pirate Birthday Party...can't wait to share it all with you.


And I promise to get to that Frugal Round-up post when I'm wider awake...hope you all can bear with me.


Have a great Thursday~

Sunday, September 12, 2010

Ahoy~

Mr. Two turns five this week. And we are throwing a Pirate Birthday Party! He requested a pirate party basically the day following his 4-year-old party. He has asked me about his "Pirate Birthday" - as he calls it - at least once a week for the entire year. So despite our family's recent events, I knew that his Pirate Extravaganza must go forward! (Besides, a boy only turns 5 once, right?)

So this past weekend I made the invitations. I had gone back and forth about what I wanted to do for the invitations, but when I went to the craft store to actually purchase the paper, inspiration struck. (We'll get to that in a minute.)

Here's what I came up with...

First, I made small newspaper hats...


Newspaper hats have always been "pirate hats" in my mind. And I thought larger versions would make cute decorations at the party as well. Should you want to make some of your own, you can find a super simple newspaper hat tutorial here.

After I made the hats, I pasted cute wooden pirate ship cutouts on the front of each hat (these were the inspiration items I found at Robert's Craft.) And in the back brim of each hat I tucked the party information printed on tan parchment-look paper and mounted on red cardstock for a little color. And FYI, if you're a font fanatic like me, I used the Blackadder font...it looks very pirate-y to me.


We're hand delivering these invites, so I didn't have to worry about how to mail them, although they would fit easily into a 5x7 envelope if you wanted to do something similar.

So now that the invites are on their way, I'll be busy creating the rest of this Pirate Party Extraordinaire. I'll be sharing with you all as I go.

Have a great day~

Wednesday, July 7, 2010

The Big 1-0~

When I asked Mr. One what kind of a birthday party he wanted this year, his reply was immediate...a BBQ and night games. The perfect kind of party for a bunch of boys celebrating one of their own moving into the double digits. That's right folks...Mr. One now has an entire decade under his belt! He was my millenium baby...and now he's ten. When did that happen?

The party had to be one of the easiest I've ever planned...Mr. One wanted to be in charge of deciding exactly what games everyone would play...Keep Away, Capture the Flag, and some sort of battle game whose rules seemed extremely complicated to me.


Playing Keep Away


He also wanted to light sparklers and throw pop-its (you know those little paper things that pop when you throw them at the ground...fun to use...miserable to clean up afterwards.)

All I was in charge of was the food... and the decor of course.

The decor? Well, Mr. One was born on the 6th of July...which is mightly close to the 4th of July. So a red, white, and blue party seemed like the obvious logical choice.

We draped a huge American Flag from the Balcony - Oh so festive!

We discovered (thanks to Mr. Three) that this little bench is a great chalkboard, so I took advantage of the fact to wish Mr. One a Happy Birthday!


It worked as the perfect gift depository.


And what do you feed a bunch of hungry boys? Hot dogs of course! With loads of chips. Soda - those mini-cans are the perfect size for growing boys...


The table was very unfussy...a little burlap for the tablecloth...red, white, and blue baskets and paperware.


Mr. Three sneaking some potato chips before the party starts.

And smores for dessert - that's when the firepit we built this weekend came in handy. (And no, it's not really in the grass...it just looks that way in the photo.)


And just to add a bit to the sugar rush...let's top it all off with cupcakes and icecream. And my disclaimer of the day? With so much family in town lately, I just couldn't bring myself to make cupcakes. So I (dare I say it?) bought them. But they were perfect...in unnaturally bright shades of red, white, and blue...and judging by how fast they disappeared, they must have tasted good.


Finally, I debated about what to give for party favors, but finally decided on these giant bubble wands I found at Wallyworld...I mean hey, they matched my color scheme. I was a bit worried that the boys wouldn't like them. But was I ever wrong. They were a hit!


All in all, a great initiation into the double digits for Mr. One. Happy Birthday to my firstborn! You are a riot!! I'm so glad you're ours!


Frugal Friday goes up at Midnight EST for all you night owls!


Have a great day~